Landmarks provide a powerful way to identify the organization and structure of a web page. The structural information conveyed visually to users should be represented programmatically in the markup using landmark roles. The use of landmarks roles supports keyboard navigation to the structure of a web page for screen reader users and can be used as targets for author-supplied “skip links” and browser extensions for enhanced keyboard navigation.
Add landmark is a setting for landmarks labels embedding to the specified interface elements. According to WCAG rules, the site interface should be split into sections and every section should be marked using landmarks labels. The list of landmarks labels is:
- banner (mandatory according to WCAG rules)
- complementary (mandatory according to WCAG rules)
- contentinfo (mandatory according to WCAG rules)
- form
- main (mandatory according to WCAG rules)
- navigation (mandatory according to WCAG rules)
- region
- search
- resources
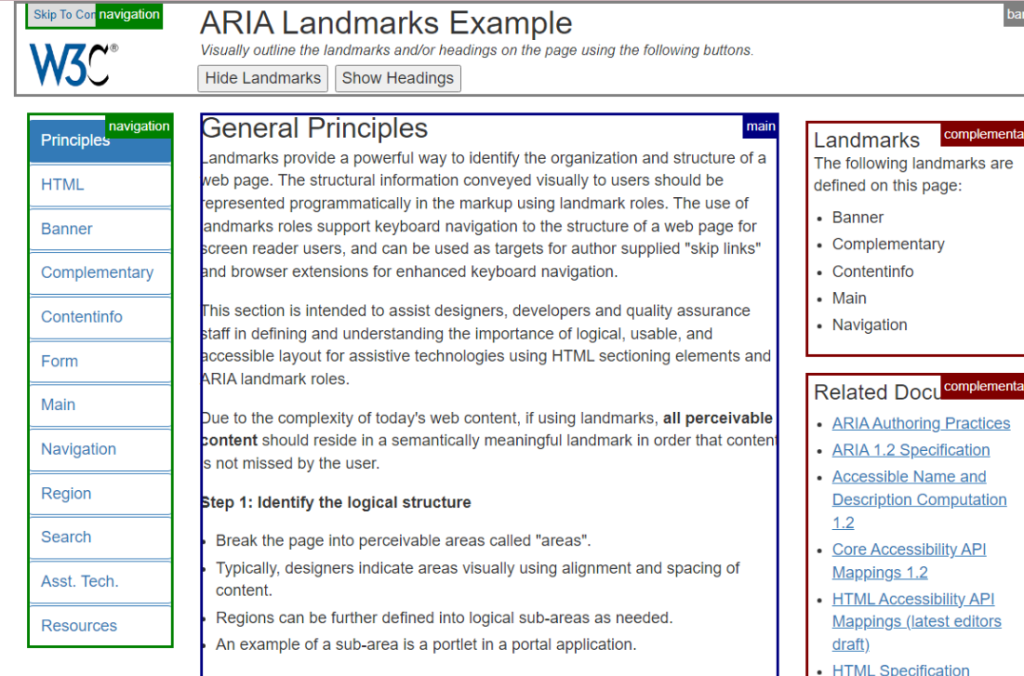
Landmarks are used to structure the content and divide the page’s interface into functionality sections for easier navigation between them. Landmarks assigning principles for all existing on-site areas are based on the type of content in this specified area:
1. If the site has a header, the relevant landmark label is “banner” (banner landmark identifies site-oriented content at the beginning of each page within a website
2, If the site has a list of articles/subsection with built-in anchor links and this list describes the represented content on the page, the relevant landmark label is “Complementary”
Only WP administrators or specified managers with required permissions are able to add landmarks using the “WCAG check” feature. This feature is available in case if the PurpleLens tool was installed and activated, and the user was logged in to the admin panel.
1.1. To add landmark select from the WordPress header’s the dropdown menu “WCAG check” (1) –>option “Full page check” (2).
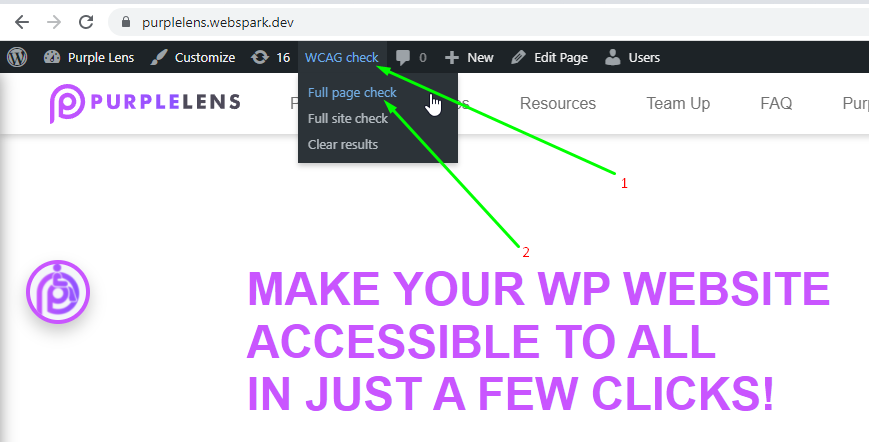
Img. 1.
2. Scroll the page and see how it was divided into separate blocks that can be used for landmarks forming.
2.1. If the detected by the WCAG scanner block does not contain a landmark, it will be marked with the symbol “?” (3).
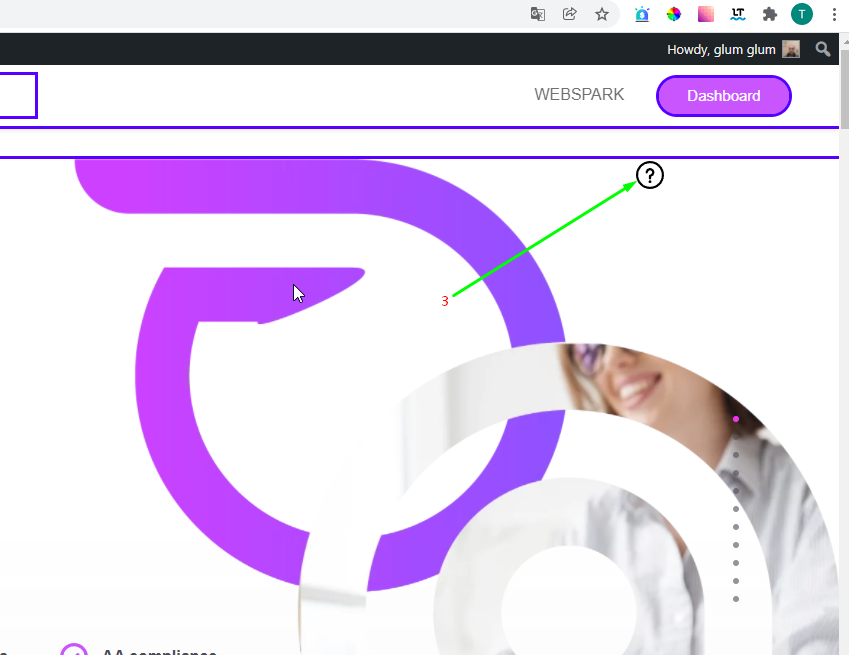
Img. 2.
3. If you click on the symbol “?”, the pop-up (4) will be displayed and the user will be able to press the button “Add custom landmarks” (5)
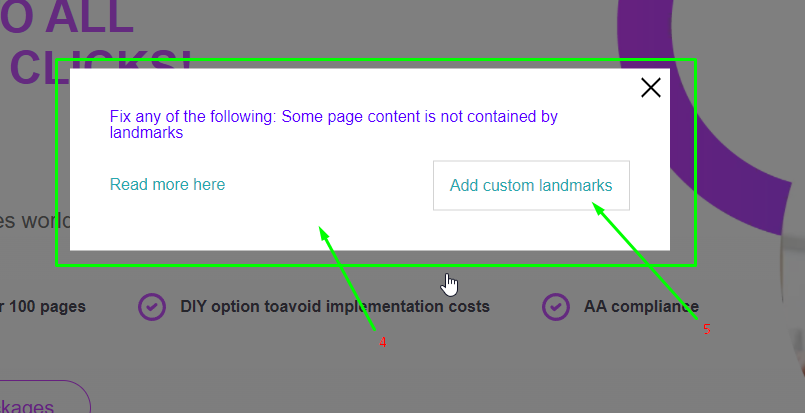
Img. 3.
4. By clicking on the button “Add custom landmarks”, the content of the pop-up will be updated and the user will get the list the required type of landmark available for selection (6).
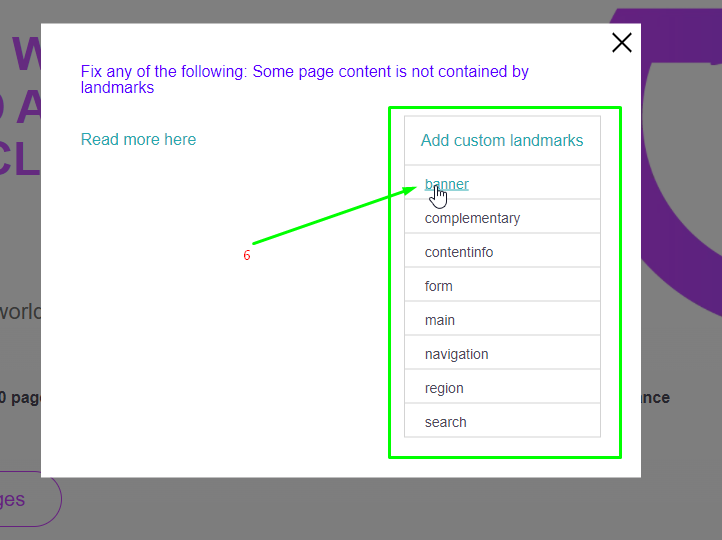
Img. 4
5. If the landmark from the list was chosen, the user will be automatically redirected to the section “Settings” in the WP admin panel.
5.1. Scroll the page with settings and find the subsection “Add landmarks” (7).
5.2. This subsection contains the next data in a tabular format :
- selector (8)
- aria-label (9)
- landmark’s type (10).
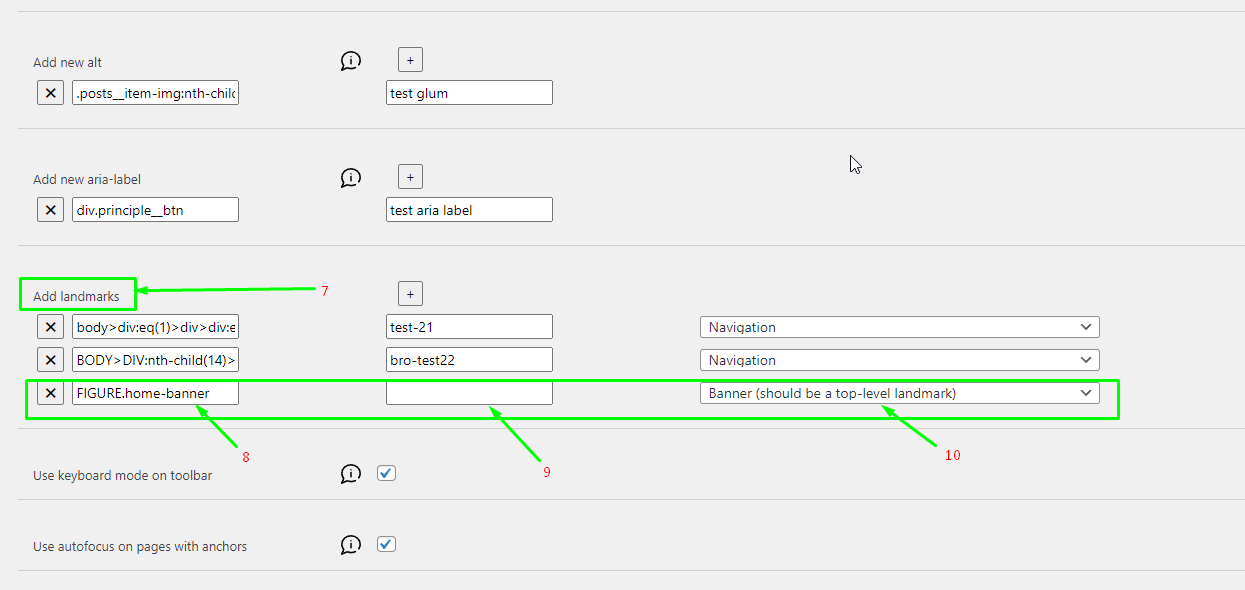
6. Review the selector and the applied landmark’s type. Add the aria-label if you need it.
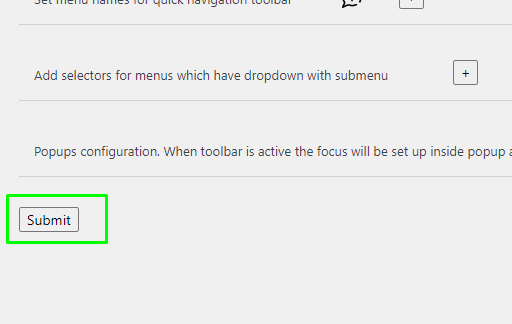
7. To keep all the providedl changes, related to configured landmark, press the button “Submit”.
Img. 6.
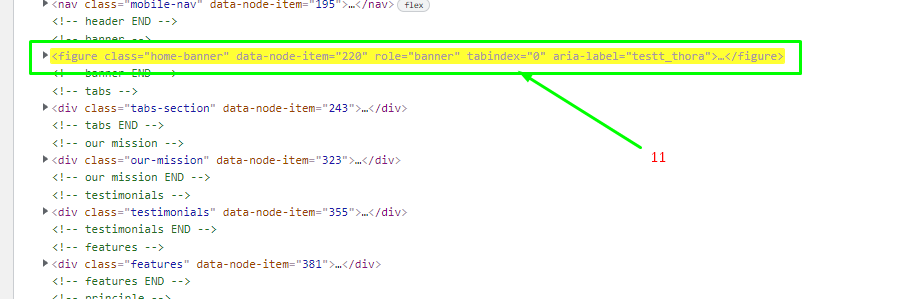
8. Landmark (11) was added.
Img. 7.